Also, I have Sandor Katz's phenomenal new fermentation tome, The Art of Fermentation, sitting on my desk. That is a book to make a person get up and tend some fungi, I'll tell you what. And I'm not just saying that because it's the first book in the history of the world to quote me. It's a wonder. More grimoire than cookbook.
Tempeh is the perfect introduction to mold-culturing, I've decided. Unlike miso, which requires a separate koji culturing process before its months-long cure, tempeh provides 36-hour gratification. It's barely more difficult than yogurt.
It's also delicious; a traditional fermented soy product with its own cheesy-nutty flavor, not trying to be meat or dairy or anything it's not. I followed Sandor's directions in tandem with the directions that came with my spores from GEM cultures.
Tempeh
The most difficult part of making tempeh is hulling the beans. Sandor explains that the hulls are too tough for the mold hyphae to penetrate. He suggests putting them through a grain mill on a setting just coarse enough to crack the beans. The other method is to remove the hulls manually after soaking, by vigorously rubbing the beans between your hands. This turned out to be a tremendous pain, and I should've just gotten out the grain mill.Once you've cracked a pound of beans (2.5 cups before cracking), soak them in plenty of filtered water overnight or longer. The timing is easiest if you cook them in the afternoon or evening, so they can get through the first 12 hours of fermentation while you're asleep.
Rinse the soaked beans in a colander, put them a large pot, and cover with water two inches above the level of the beans. Bring to a boil, watching closely. When they boil, turn the heat down and set a timer for 40 minutes. Skim off the hulls as they float to the surface.
While they cook, prepare your fermenting dishes and incubation chamber. Choose glass or stainless steel pans--I used two glass bread pans and a pyrex casserole dish. They only need to be clean, not greased or anything. For my incubator, I put a 60-watt incandescent bulb on the end of an extension cord and ran it into the bottom of the oven. I placed a pie tin on the bottom shelf over the bulb to diffuse the heat a bit. You're aiming for 85 degrees. As the temperature came up, I tested various corners of the oven and adjusted the door, which I found needed to be cracked about 1/4 of an inch.
Get the spores ready, too. I mixed 1 teaspoon of spore powder with 1 tablespoon rice flour and 1 tablespoon brewer's yeast. The amount of spore powder you need depends on where you got it from--follow the package directions.
The beans will still be quite firm at the end of 40 minutes. Drain them in a colander, then spread them thinly on clean towels to cool and dry. You might turn a fan on them to hasten the drying process, as mine were cool long before they were dry.
Put the dried, cooled beans in a large mixing bowl and sprinkle half the spore mixture over top. Stir it in thoroughly, then sprinkle on the rest and stir it in. You want a very even distribution of spores. Pack the beans into an even, inch-high layer on the bottom of your fermentation vessels and cover securely with tinfoil. Poke holes an inch apart all over the tinfoil, and put the trays in your incubator.
Keep a close eye on the temperature in the incubator, so maintains a stable 85-90 degrees. Rotate the pans as necessary to avoid hotspots.
After twelve hours or so, you'll start to see some good mold growth.
Continue adjusting the temperature and rotating the pans as necessary. Watch out! Once the mold starts to get established, it will generate a heat of its own. It could easily overheat and cook itself to death. If you see the temperature start rising, remove your heat source and keep a close eye on the mold.
The tempeh is done when it's covered with an even, spongey layer of mold that tightly binds the beans together. In fact, it will even contract and pull away from the sides of the pan.
This pan of tempeh is perfectly done. You'll notice that the mold began to sporulate in the upper right. (The spores are gray-black.) I took a preggo nap towards the end of the fermentation time, and when I found this upon waking, I was a bit worried. My tempeh was perfect, however, and a little sporulation is a good sign that the tempeh is mature. Total fermentation time was 21 hours.
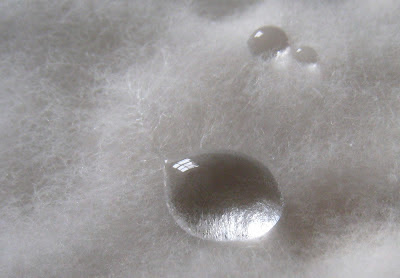
But look at the beads of condensation that fell onto the mold!
My favorite way to serve tempeh is to slice it and marinate it for a few minutes in some soy sauce. Then I gently fry it in butter until golden. You'll need to add more butter to the pan when you flip the tempeh slices, since they really sponge it up. I think it tastes like a grilled cheese sandwich.
Last night I also dressed it with a miso-lime-garlic sauce, which meant that I was eating fermented-soy-marinated fermented soy beans with fermented soy.


